This page provides a guide on how to navigate and use this site to fulfill your assignments for INFO 601, and of course, to facilitate dialog around the foundations of information.
(If images appear small, please click on them to enlarge.)
Adding Links, Footnotes and Media
Publishing Your Post (Publicly or Password-Protected)
1. Creating an account
To begin using the site to its full potential, you must make an account. On the login page (http://studentwork.prattsi.org/foundations/login), you can register, change your password, or login to the site.
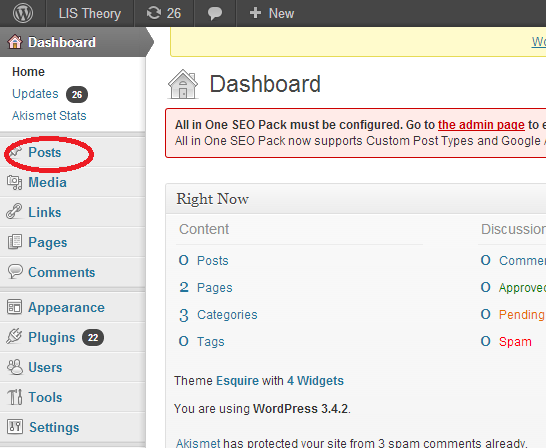
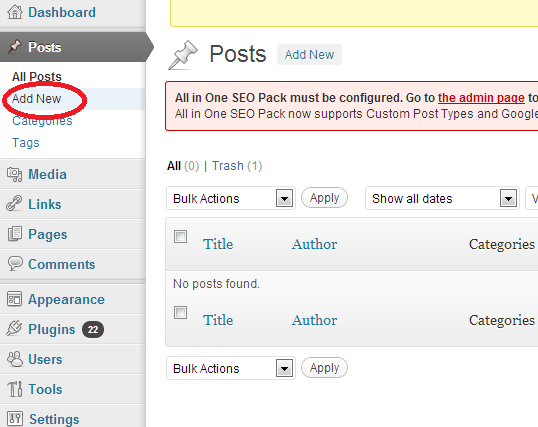
2. Making a post
Once you are logged in you will be in an environment known as the dashboard. To create and publish a post you must go to the menu on the left side of the screen and locate the ‘Posts’ button near the upper left corner (see below). Click on the button to reveal the Posts menu. Click on the ‘Add New’ button (see below).
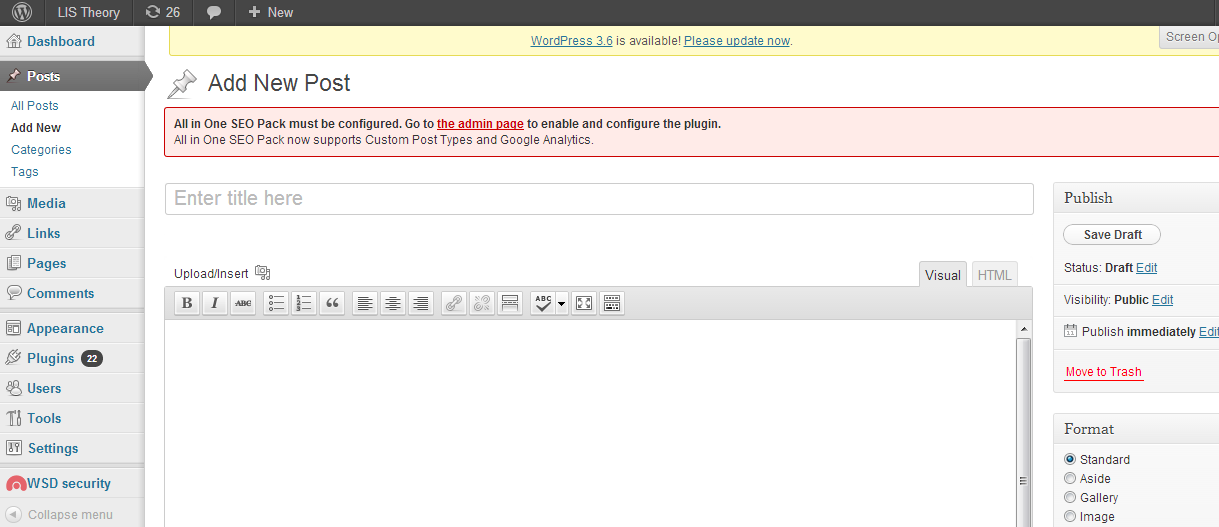
This will take you to the Add New Post page, as seen below. At the center of the page is a box that looks a bit like a word processor window, and that is where Posts are made.
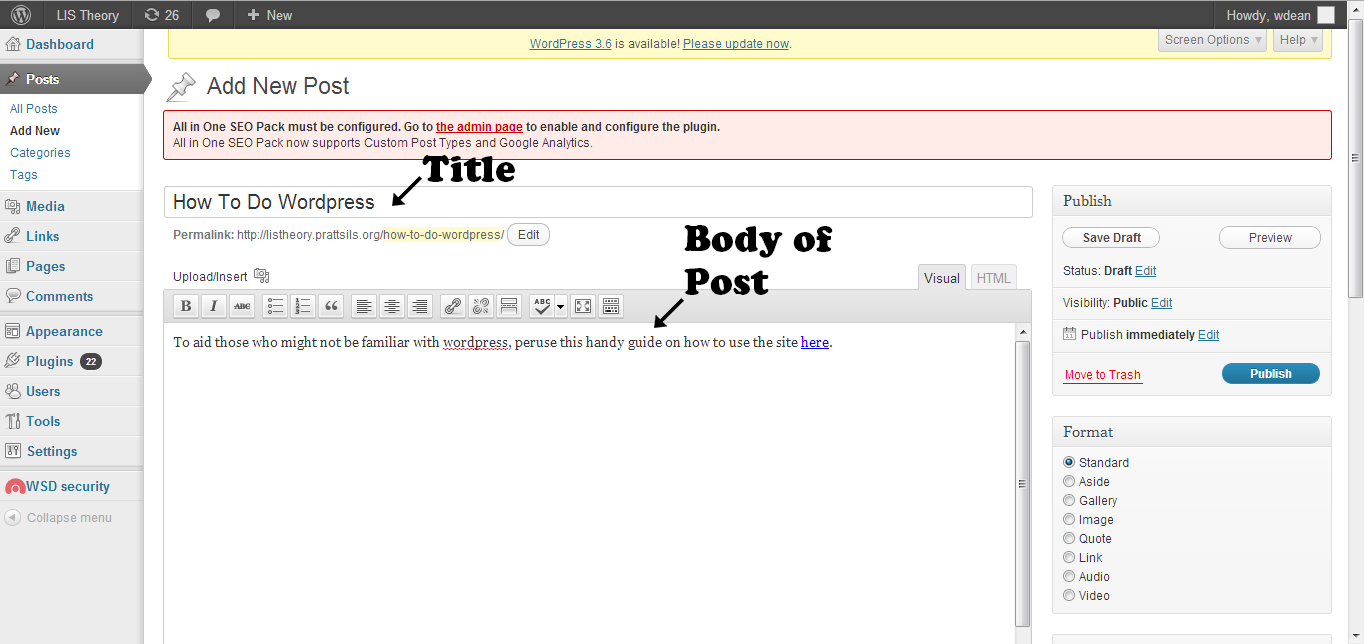
In the box with “Enter Title Here” in it, write the headline of your post, like the title of your paper. In the box below it write your post as you would in a word processor. The buttons at the top function in the usual way (‘B’ is for bold, the chain links let you turn selected text into a hyperlink, etc.).
3. Adding Links, Footnotes and Media
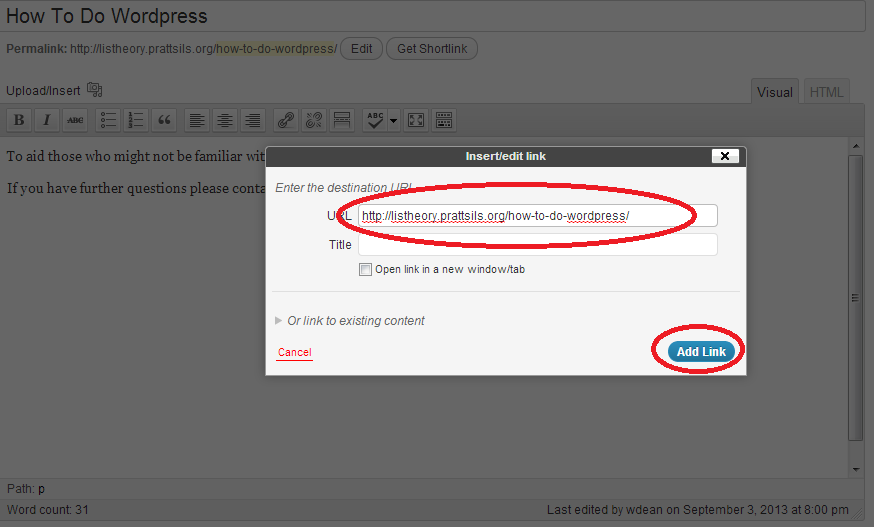
Link: You can easily add links and footnotes to your post to provide easy access to more information. To link a word or phrase highlight it and then press the link button in the toolbar above the Body post area, it looks like a couple of links of chain (see below).


Then paste the link you want in the URL box and click ‘Add Link’ (see below).
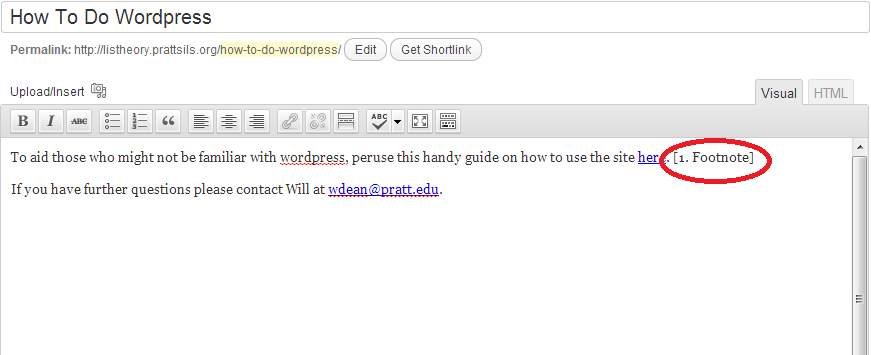
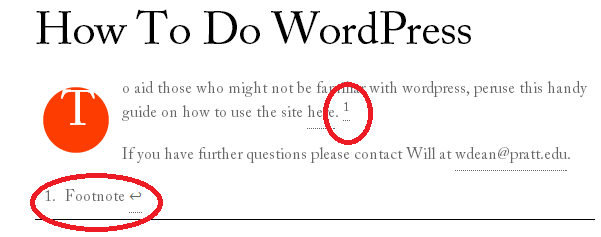
Footnote: To create a footnote use this exact procedure. Type a square bracket, a number (the order does not matter), a period, a space, then the text or link you want to use as a footnote, and then another square bracket. It should look like this: [1. text or link]. See the example below.
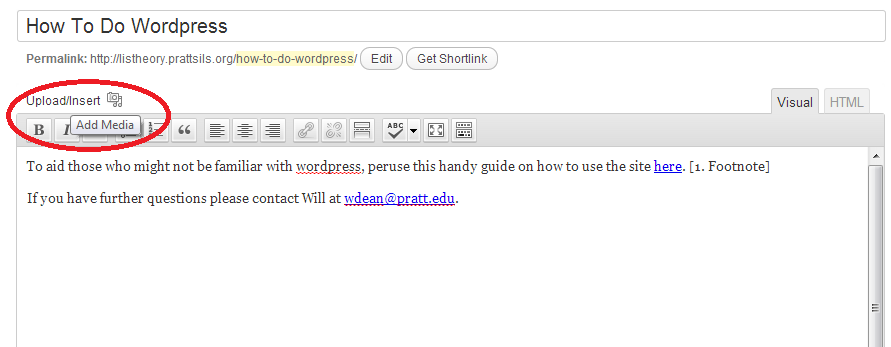
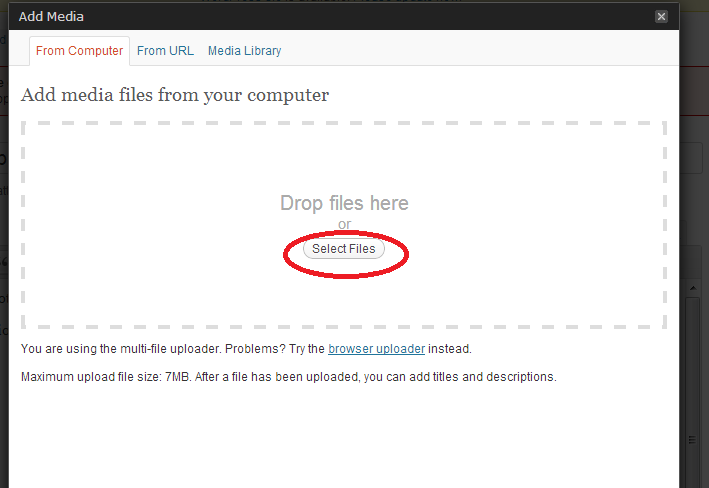
Media: To add media, like a picture or song, click on the ‘Upload/Insert’ button above the Body post toolbar. This will open the media gallery uploader.
You can either press ‘Select Files’ to browse your computer and find the media you want, or drag-and-drop the file from your desktop into the box on the uploader with the dotted line around it.
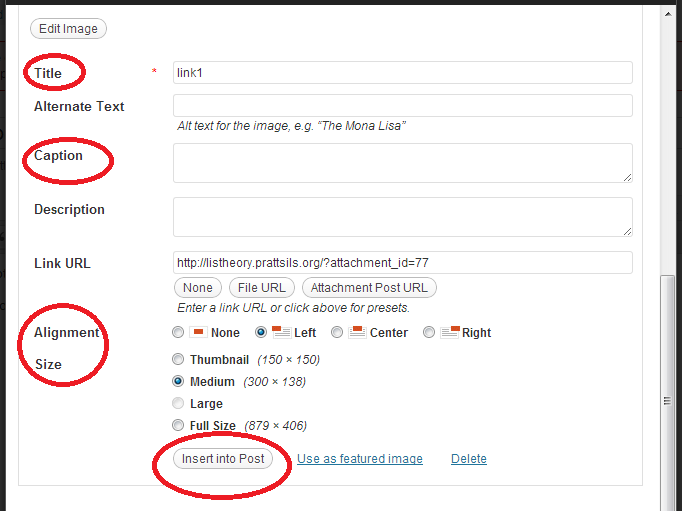
Once you have added some media, you can change the title, add a caption, change the alignment (how it will appear in the post), and the size. Most importantly, you must click “Insert into Post’ to actually add the media. Once it’s added you will see the media in the Body Post area. You may need to move your text around to make it look like you want or even change the alignment and size (you can do this by clicking on the media and pressing the button that appears that looks like a landscape).
4. Using categories and Tags
Categories
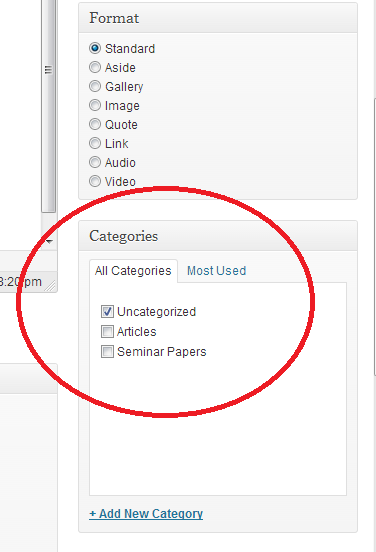
To help group posts together you can use categories and tags. The Categories are ‘Articles’, ‘Observations’ and ‘Seminar Papers’. The short article on your observation should be posted in ‘Observations’ and the other two are ‘Articles’. The final paper is a ‘Seminar Paper’. You can find the Categories section on the right-hand side below the format box. You may need to scroll down to see it. Please check the appropriate category for your post.
Tags
Tags can also help group posts together based on the topic of the post. The Tags box is below the Categories box. Type appropriate tags for your post, such as: philosophy, information science, foucault, power, libraries. Separate your tags with a comma (this also allows you to use a phrase as a tag as long as it does not have a comma in it). Then click the ‘Add’ button to add them. After people start making posts and tagging them, previous tags will pop-up when you are typing so please use the same ones as your fellow classmates if you think they are applicable!

5. Publishing Your Post (Publicly or Password-Protected)
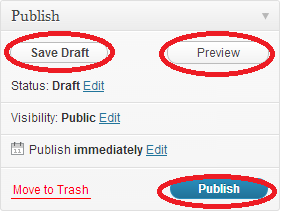
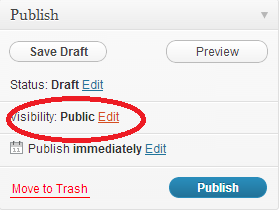
In the ‘Publish’ box, which is to the right of the post word processor box you can do a variety of things to your post. You can save a draft of the post if you want to work on it more later by pressing the ‘Save Draft’ button (see below). The ‘Preview’ button will let you see what your post will look like and the ‘Publish’ button will publish your post onto the site.
Public v. Password-Protected
The site is set to automatically publish your posts publicly, but you can publish them password-protected and then send the password to the instructor. To make your post password-protected click on the ‘Edit’ link next to ‘Visbility: Public’ (see below).
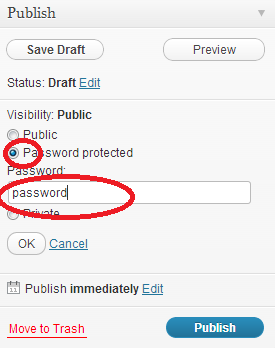
This opens the visibility menu where you can choose ‘Password protected’ and enter a password after you have selected that option (see below). Please note that the box where you enter the password only appears after you select that option. Also, do not use the word ‘password’ as a password ever anywhere.
IMPORTANT: Do not click on ‘Private’ as that will make the post only visible to computers logged onto your account.
One thought on “How To Post”